Awning Fitting Guide
When it comes to fitting a caravan or motorhome awning to your vehicle there are a number of ways you can do it. The best method to use varies depending on the type of awning you are trying to fit, how you plan to use it and, perhaps most importantly, what fittings you already have on the side or your 'van.
This guide will go through the various methods of fitting porch awnings, drive-away awnings, roll-out (bag) awnings and traditional caravan awnings and deal with wind-out or 'Case Awnings' at the end as these require special attention.
When working out how to fit your intended awning the first thing to do is look at what's already fitted to your vehicle to check your options and ensure it can be done.
Awning Rail / C Rail

What fits?
- Traditional caravan awnings
- Drive away awnings
- Porch awnings
- Roll out / Bag awnings
When looked at from the end awning rail has a C-shaped profile (hence 'C'-rail) and is commonly fitted to new caravans in one continuous piece along both sides and the top of one side wall. It can also be bought in straight aluminium sections for aftermarket fitting by drilling and screwing to the 'van, although in this case it would normally be fitted along the top of the 'van side wall only.
For DIY fitting of awning rail make sure to use a suitable sealant to avoid leaks in the 'van wall.
Awning rail is the most secure fixing method to use if you are fitting a porch or drive-away awning and is the only suitable option if you want to fit a traditional caravan awning or roll-out/bag awning.
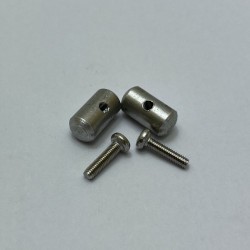
The vast majority of awnings come with a round beading along the edge which fixes to your caravan or motorhome. To attach the awning unfold it and slide the beading into the end of the awning rail and along until the awning is in the right position. If you are fitting a roll out awning you will need to unfold the awning from the bag before fitting into the channel and use a bullets kit to secure the bag in place. This stops the awning sliding along the rail when the 'van is on the move.
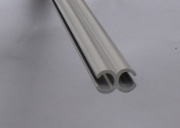
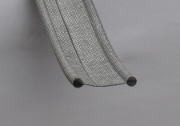
Using a drive-away fixing kit which contains figure 8 and double sided kador strip can make fitting porch and motorhome awnings easier and gives the ability to drive away from freestanding awnings. To fit, slide one side of the double sided kador into the C-rail and then connect the awning beading to the kador with the figure 8 strips. To drive-away simply slide out the figure 8 strips.
Rain Gutter / J-Rail

What fits?
This type of gutter has a J shaped profile when looked at from the end (hence J-Rail) and is common on campervans, especially VW Campers and Ford Transit conversions. On many vans it is already fitted and is actually a gutter over the doors to divert rain water from the roof.
If it is not already fitted to your van, J-rail can be bought in straight aluminium sections for DIY fitting by drilling and screwing to the motorhome wall. If you are fitting awning rail yourself remember to use a suitable sealant to avoid leaks in your vehicle.
J-rail and gutter is used with sections of plastic figure 8 and is the quickest method for attaching and detaching awnings and so is the most popular choice for drive-away awnings. To fit the awning to the 'van, start by pitching the awning and sliding one side of the figure 8 onto the awning beading. The other side of the figure 8 is then placed over the lip of the J-rail. Gravity and tension in the awning side wall will pull the figure 8 down onto the rail to give a secure connection.
When you want to disconnect the awning to drive away simply lift the figure 8 to unclip from the rail and leave it attached to the awning for when you return.
N.B. - If your vehicle has a high top fitted it is possible the rain gutter has been used as a mounting for the roof and filled with sealant. If you want to use the original gutter to fit an awning we recommend you check the gutter has not been filled and still has a prominent lip to connect to.
Shallow Gutter
What fits?
This type of gutter is mostly found on early VW Campers and other older campervans. It has a less pronounced lip than normal guttering (J-rail) so does not offer as good purchase for figure 8 fixings.In some cases it is still possible to use figure 8 as with J-Rail but some owners report awnings being lifted off the gutter by the wind.
In these circumstances the pole and clamp fixing kit is a much better option and gives a more secure fit.
For this fixing method you should bear in mind the awning must have a pole sleeve long the edge of the awning which fits to the van. Many drive-away awnings do have this but be sure to check prior to purchase if this is the method you want to use.
To fit the awning with pole and clamp method, pitch it and then insert the pole into the pole sleeve before clamping it into the gutter on the 'van. When you want to drive away simply undo the clamps and slide the pole out of the sleeve.
Nothing on the 'van
What fits?
- Drive-away awnings
- Porch awnings
- Roll-out / bag awnings
- Full Caravan Awnings - may require minor adaptation of the awning
- Wind-out / Case awnings

If you don't want to have awning rail permanently fitted, or don't feel confident drilling your vehicle, there is now a magnetic awning rail kit available which is suitable for use with drive-away awnings. This kit comprises of sections of figure 8 and a magnetic strip to attach to your van.
To fit you slide one side of the figure 8 onto the beading of your awning and feed the magnetic strip into the other side. The magnetic strip is then placed on the wall of your 'van.
Sorry if we are stating the obvious but since this is a magnetic kit it is best suited to motorhomes and will only work on steel walls. It won't work on caravans or motorhomes with plastic, fibreglass or aluminium walls.
If you have no rail on your van you have one final option for fitting an awning . Most drive-away awnings have eyelets on their connecting edge allowing you to use guyline to tie over the roof of the van or tie to a roof rack if you have one.
This is the cheapest and simplest method of attaching an awning but bear in mind it does not give the best seal against the vehicle and it won't work with porch or caravan awnings. You should also check to ensure the awning you want has eyelets prior to purchase if you want to use the method.
Case Awning - Fiamma F45 & F65 and Omnistore

Wind-out case awnings such as the Fiamma F45 are F65 are often heavier than other types of awning, come in rigid metal cases and require semi-permanent fixing to the wall or roof of your caravan or motorhome. Because of their weight and design, Case Awnings require a solid structure to mount to and some vans require vehicle specific fixing kits to ensure they are properly mounted and set at the right angle.
If you have a Fiamma awning, or are thinking of buying one, and would like advice to help ensure you get the right fixing kit for your vehicle please call our specialist Fiamma section on 0161-902-3025 who will be happy to help.
Most Fiamma fixing kits are simple enough for DIY installation but if you would rather a professional do it we can recommend JMR Caravan Care who can come to your home, are fully insured and guaranteed and offer professional awning fitting in Greater Manchester, Cheshire, North Derbyshire and South Lancashire.
Drive-away awning with existing Case Awning
If you want to fit a drive-away awning and already have a wind-out / case awning on your caravan or motorhome, it can be possible to attach the drive-away awning directly to the case awning without the need for another awning rail.
To check if this is possible take a look at the lead bar of your existing awning to see if it has a recessed channel in the front. If it does it is possible to fit a drive-away awning directly to the case awning.
You will need to purchase the Fiamma / Omnistore drive-away fixing kit with your new drive-away awning. This kit consists of a double beaded kador strip and figure 8 sections. To fit
- Wind out the lead bar by a few inches
- Slice one side of the kador strip into the recessed channel on the lead bar
- Wind the lead bar back in. The kador can be left in place from now on
- Pitch the drive-away awning
- Use the figure 8 sections to attach the beading on the awning to the other side of the kador strip
More help
If you would like more help with fitting an awning please get in touch by phone on 0161-998-8523 or by answering a few questions using the form below.


